New Computer
PS Cashbook: New Computer
Summary:
I have purchased a new computer and would like to transfer my Cashbook program and data from my old computer to my new one. How do I do this?
Detailed Description:
There are a number of steps involved in Installing Cashbook on your new computer and transferring your data across:
- Backup data from your old computer.
- Install PS Cashbook on your new computer.
- Register your new PS Cashbook installation.
- Restore your data from your backup.
Step 1: Backing up your data
If you have access to the Practical Systems Data Warehouse, backup your data to it, taking note of the relevant steps below.
If you do not have access to the Practical Systems Data Warehouse you will need to back up your data to a USB Stick.
If you have one company:
- Click on the File > Backup Data Files menu option.
- In the Backup to files box, click on the Browse button.
- Find your USB in the file explorer. It will be marked as Removable Disk in Computer or My Computer
- Click on the Save button. This will take you back to the Backup Data Files screen.
- Tick all the years listed underneath your company name, including Most Recent Year.
- Click on the OK button. After processing, your files will be saved onto your USB.
If you have more than one company:
- Click on the File > Multi-Company Backup menu option.
- In the Backup to files box, click on the Browse button.
- Find your USB in the file explorer. It will be marked as Removable Disk in Computer or My Computer
- Click on the Save button. This will take you back to the Backup Data Files screen.
- Tick all the boxes next to each individual company.
- Click on the OK button. After processing, your files will be saved onto your USB.
Step 2: Installing Cashbook onto your new computer
To ensure you are installing the most up to date version of PS Cashbook it is best to install the program from our website.
- Go to www.practicalsystems.com.au
- Select Client Support > Client Downloads.
- You may than have to enter you Client ID and Password.
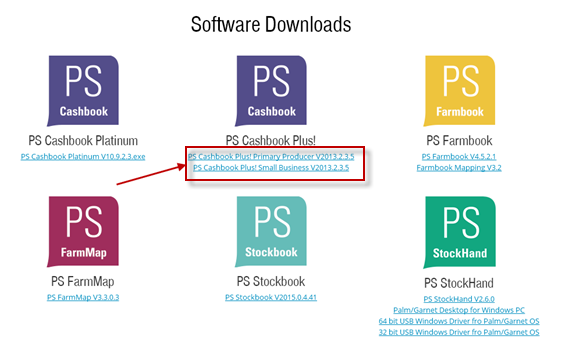
- Click on the appropriate link
- If prompted to Run or Save, click Run, otherwise click Save
- Install the software (from your Downloads folder if you Saved the file)
- When asked, select Standard Installation.
Step 3: Register your program
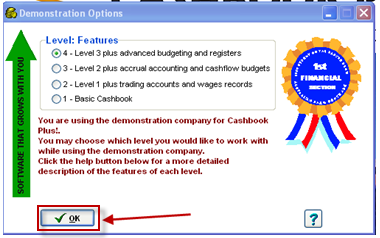
- After the program has been installed there will be a PS Cashbook Plus! icon on your desktop.
Double click on the icon and click on the OK button when asked to select a Demonstration Option.
- Click on the File > Registration menu option.
- Enter your Client ID in the required field.
- Click Register Cashbook
- When prompted, re-enter your Client ID.
Step 4: Restore your data
Now restore the data from your old computer onto your new computer.
- Click on the File > Companies menu option.
- Click on My Business and click on Select.
- Take the USB stick that you backed-up your data to in step one and insert it into your new computer (if you didn't backup to the Data Warehouse)
- Click on the File > Restore Data Files menu option.
- In the Restore Data Files box, select from local file (or choose Data Warehouse if using that) and click Load Backup.
- Find your USB in the file explorer. It will be marked as Removable Disk in Computer or My Computer.
- Select the required file.
- Click on the Open button. This will take you back to the Restore Data Files screen. Select all the boxes underneath the company name.
If you backed up several companies, tick all the required companies to restore.
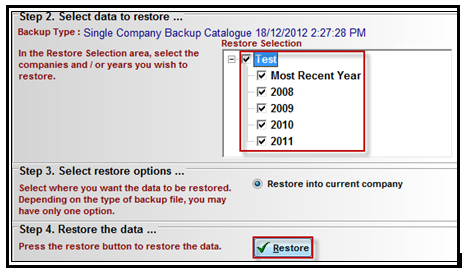
- Click on the Restore button.
- After processing, your files will be saved into the relevant companies.
- Click on the File > Companies menu option if you wish to rename any of the companies.
- You are now ready to start work.