Regular transactions via creditors
Regular Transactions via Creditors
Cashbook provides a method of setting up regular transactions that can be processed automatically. There are two parts to this process:
Part 1. To Set up Regular Transactions
Part 2. How to Process Regular Transactions
Please Note: Regular transactions still need to be processed to be completed
Part 1: To Set up Regular Transactions
Step 1: Creditors
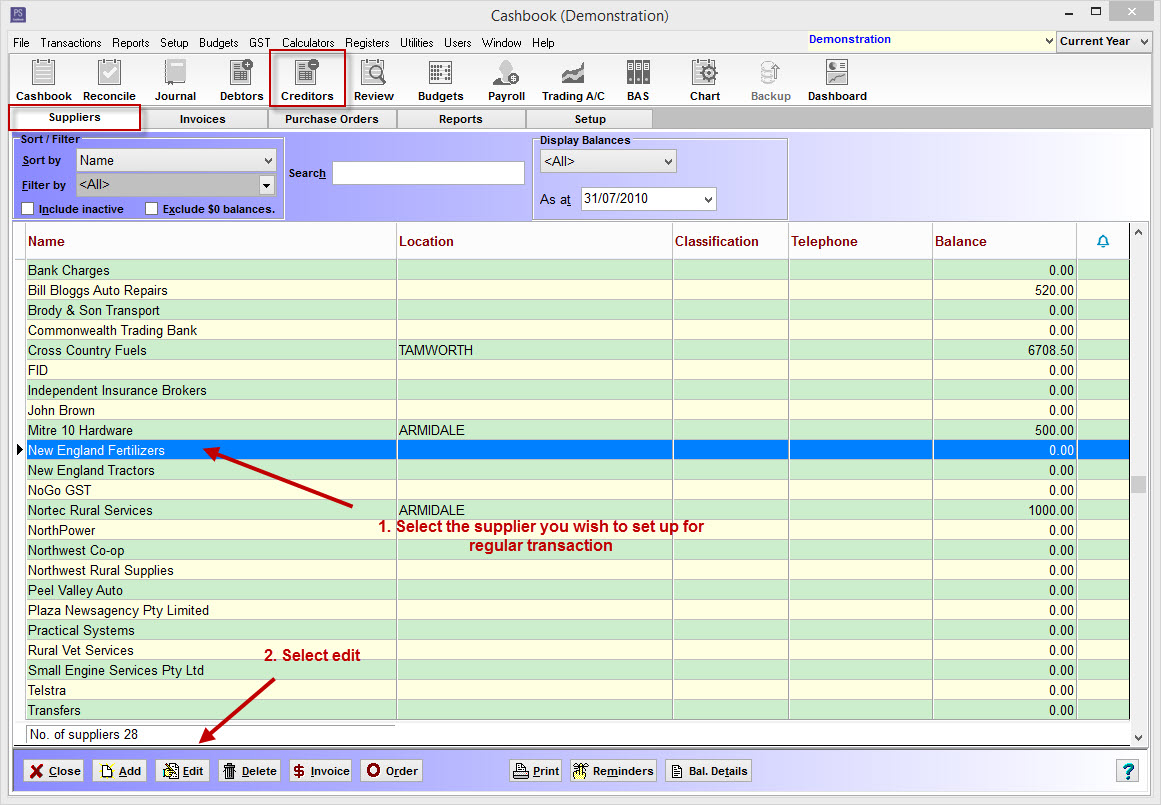
- Open Cashbook and click on the Creditors toolbar option

Step 2: Suppliers
- Click on the Suppliers tab
- Select the supplier you wish to set up a regular transaction for and click Edit, or double-click on the supplier
Step 3: Dissection Lines
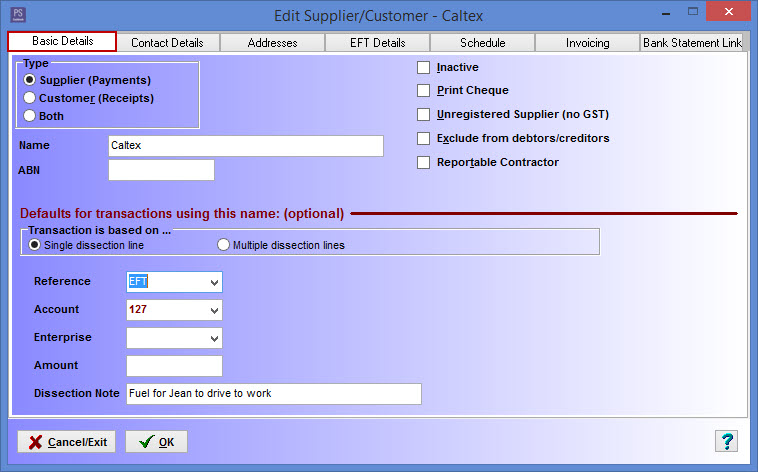
In the Basic Details tab, select either Single dissection line (if only wanting to create single-account transactions) or Multiple dissection lines (if wanting to create multiple-account transactions)
- If Single dissection line is chosen you will then be able to add any of the following details you require; Reference, Account, Enterprise, Amount and Dissection Note.
- If Multiple dissection lines is chosen you will be able to add any of the following you require; Reference, Amount, Account, Enterprise, Value Type, Value or Note.
Step 4: Schedule
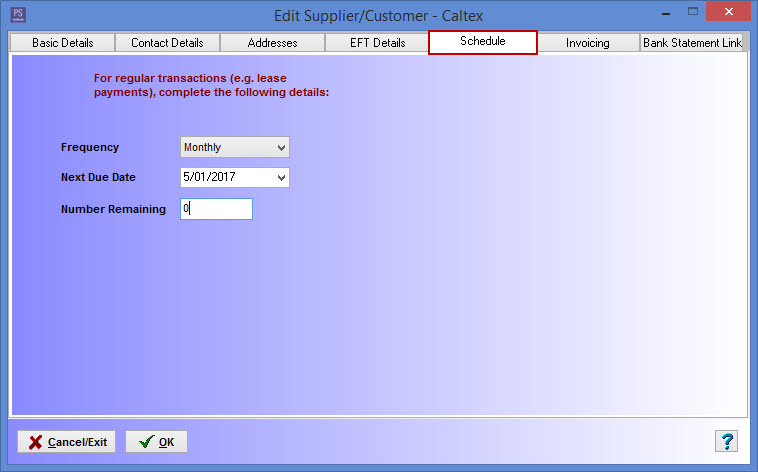
Click on the Schedule tab and complete the details that you wish to make applicable to this transaction:
- the Frequency that you would like the transaction to occur, either Weekly, Fortnightly, 4 Weekly, Monthly, Quarterly or Twice a Year
- Next Due Date
- Number Remaining If you do not how many remaining transactions there will be but you want these transactions to continue for a while select a large number, for example 100, and then stop the regular transactions if they end before the 100 repeats are completed
- Click OK to save the settings
2. How to Process Regular Transactions
Step 1: Transactions
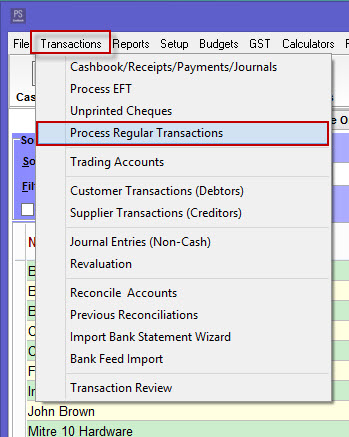
- Click Transactions
- Process Regular Transactions to display the list of regular transactions due for processing
Step 2: Check Transactions
- If there are some transactions in the list you do not wish to process, un-check the box under Process by left clicking once in the box

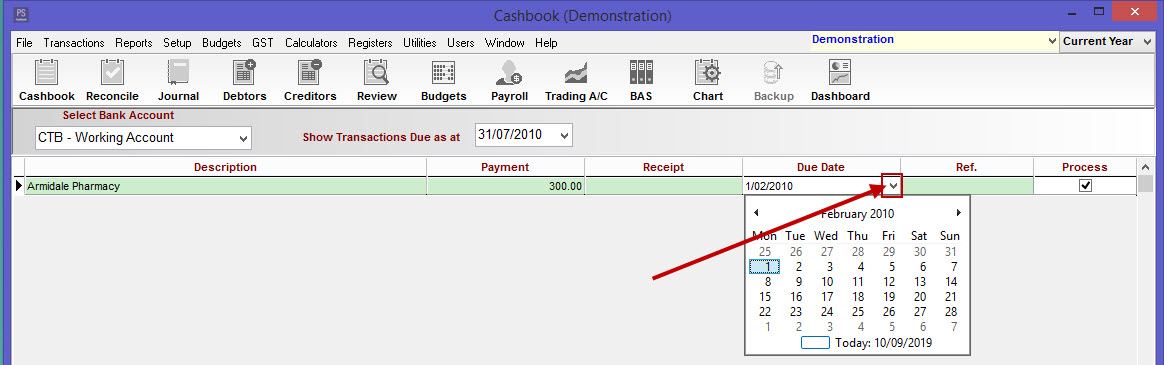
ii. Prior to processing transactions it is possible to change the Due Date if required. This can be done clicking the drop down arrow next to the due date for the transaction
Step 3: Process
- Once only the transactions you wish to process are ticked click the Process button
- To complete processing these transactions click Yes when prompted
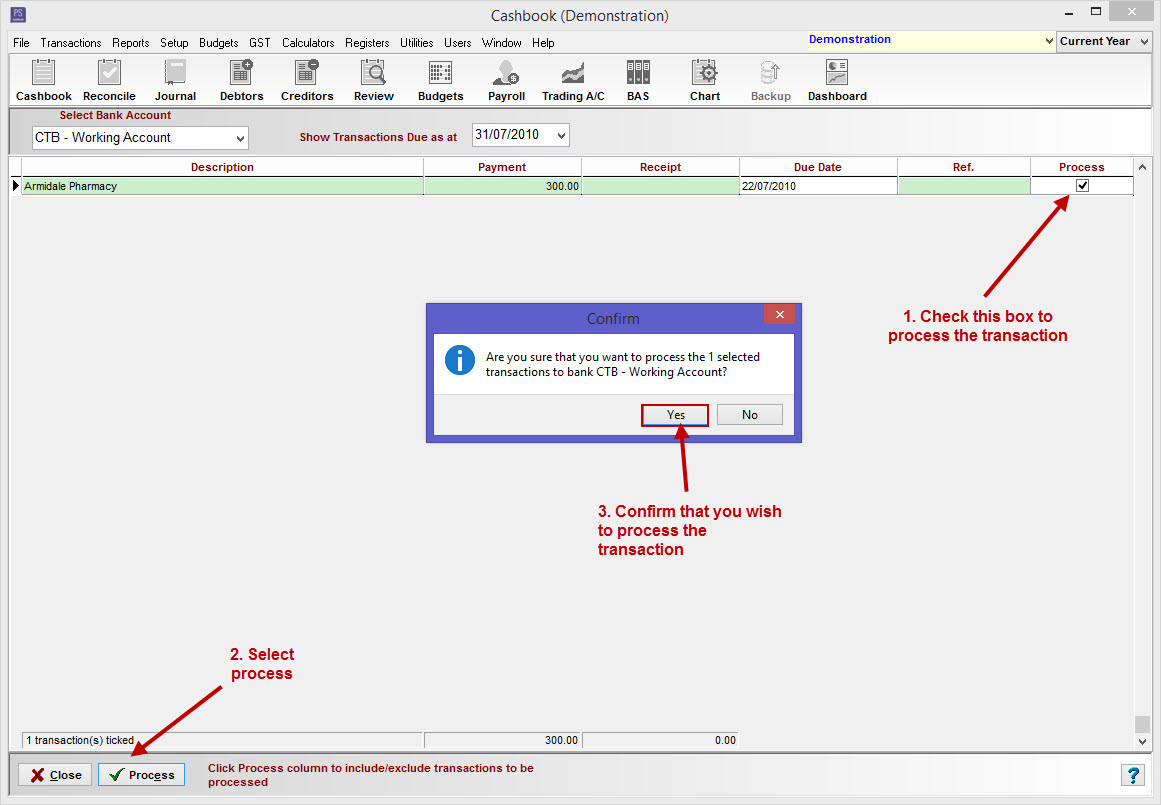
iii. A prompt will then appear, saying Processing Complete. This will have also reset the next due date for each transaction
Article ID 1003